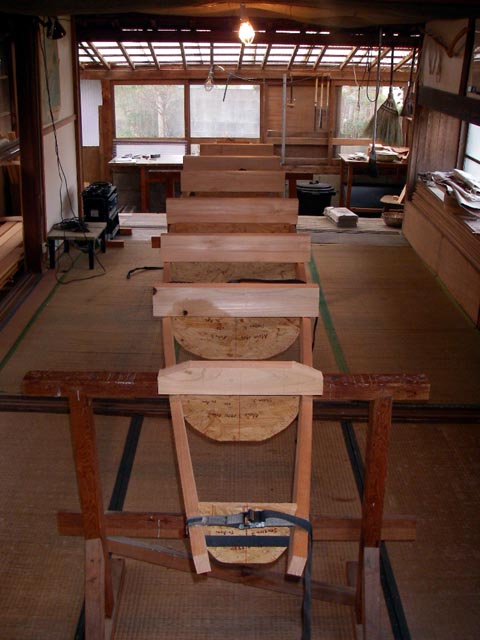
2月7日 ガンネル材の加工 その2 Processing of gunwale 2
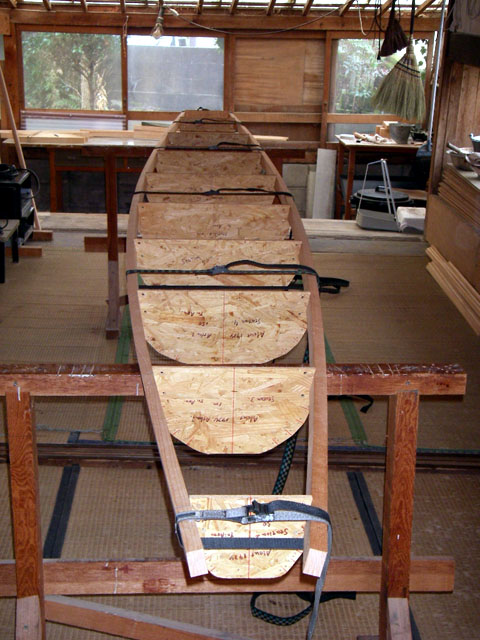
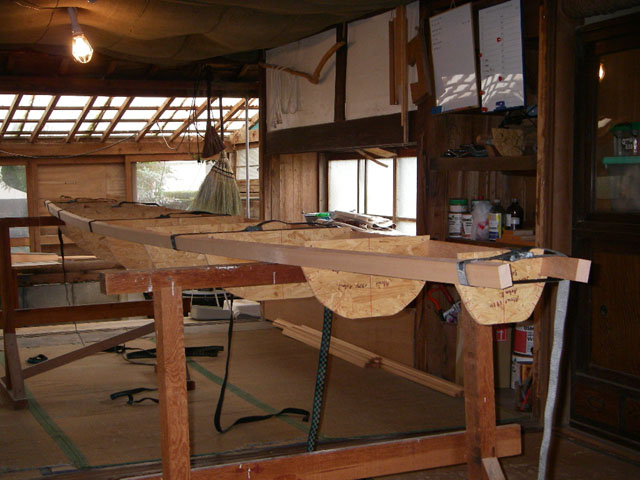
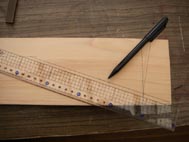
ガンネルの長さとデッキビームの位置を計る。デッキビームとは2本のガンネルの横に渡す材で、このバイダルカには7本入る。説明ではバウ側から1〜7番ビームと呼ぶ。
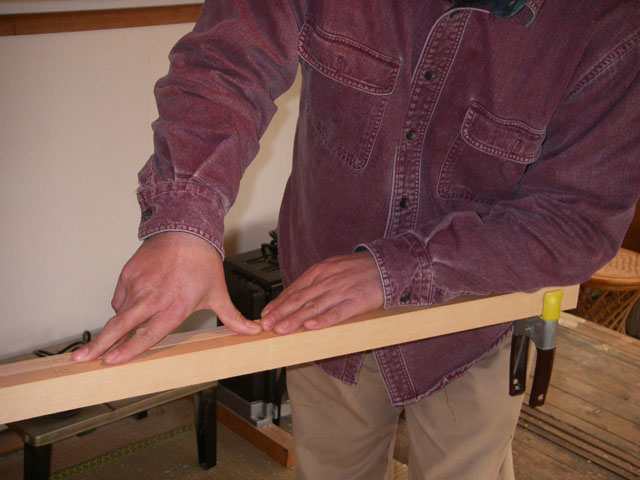
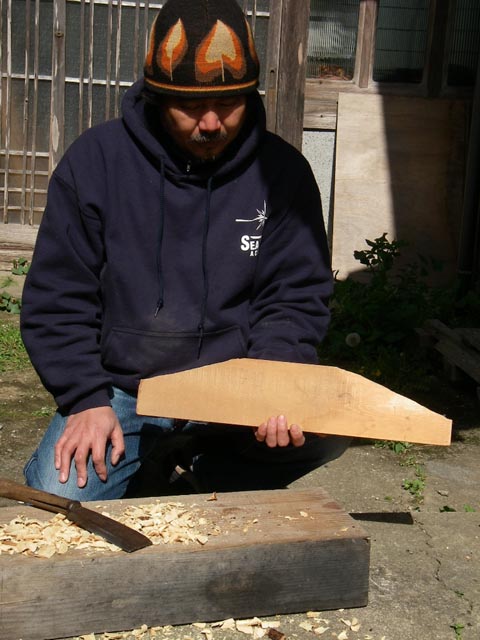
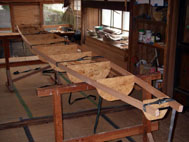
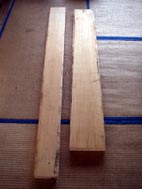
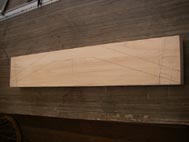
今回復元するバイダルカは、先に紹介したデーターから全長約510cm、ガンネルの長さは約448cmとなる。長さ6mのガンネル材から、さらにもっとも適切と思われる部位を見つけ出し、448cmの長さに切り落とす。穏やかだが緊張をともなう工程だ。
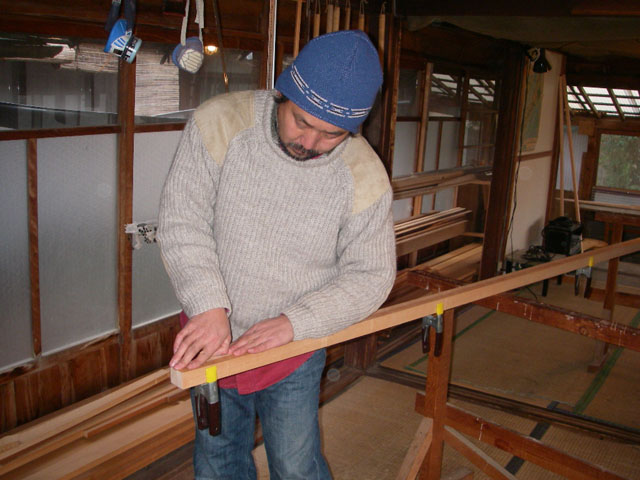
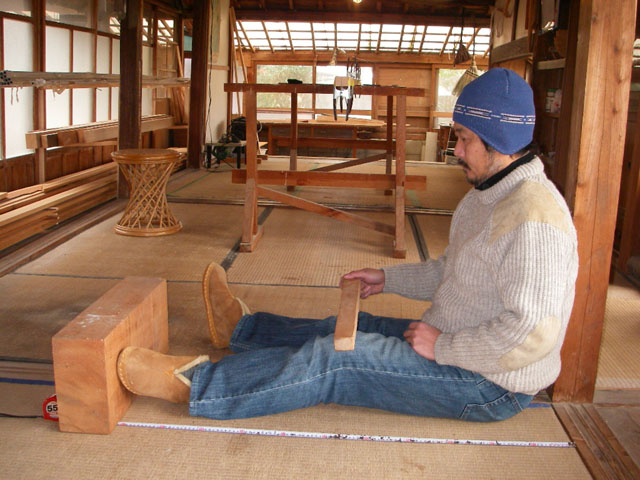
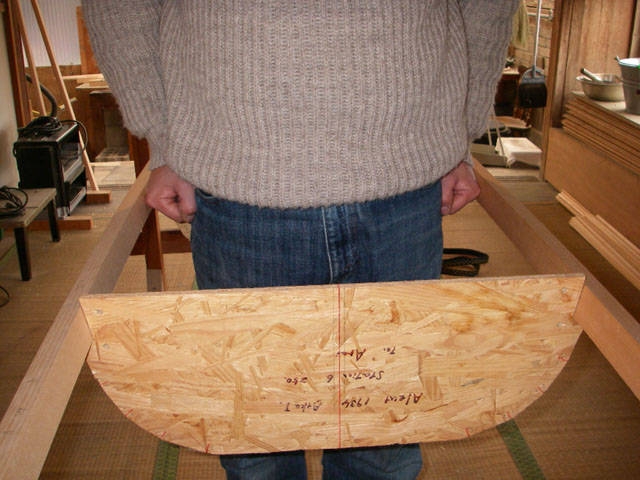
バイダルカは乗り手の体格に合わせて作る。ガンネルの長さは写真1〜4のように計る。身体で計ると、バイダルカから当時のアリュートの様子を知る事ができる。1934年にアトカ島で暮らしていた、このバイダルカの乗り手は身長約165cm前後だったと思われる。
The measurement length of gunwale and position of deck beams. A deck beam is, a lumber to carry between two gunwales. And the bidarka that we are going to build this time has seven beams. By explanation in here, I call it the 1st beam from the bow side, 7th beam to the stern side.
The baidarka in this project, about 510cm full length, and length of a gunwale become about 448cm by the data which I introduced before. From a gunwale strake of 6m in length, I choose and make cut an appropriate part to 448cm in length. It is easy, but it is work with some strain.
Size of baidarka is decided with a build of a future paddler. The photographs 1-4 bellow show a method to measure length of a gunwale. That means, adversely, we can know a figure of Aleutian paddler from his bidarka. I can suppose that this Aleutian paddler who lived in Atka island around 1934, was about 165cm tall.
次に写真5,6のように3番ビーム・フットレストの位置を計る。僕は右足に傷害があり曲がらないが、両足は揃える。さらに写真7のように7番ビームの位置を計る。2番ビームは1番と3番の間あたり、6番ビームは5番と7番の間あたりとなる。
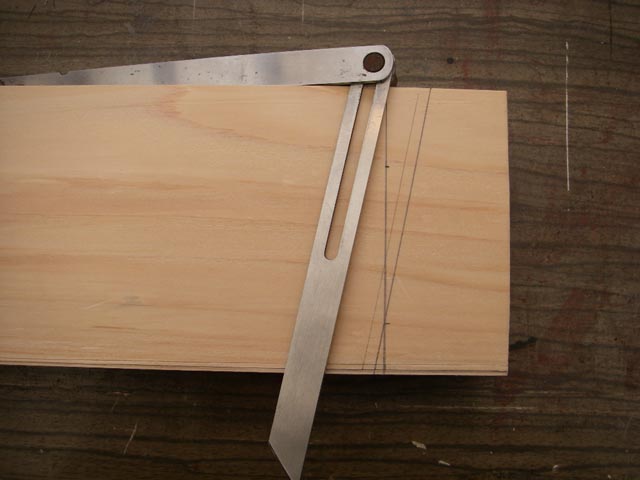
このようにしてガンネルの長さとデッキビームの位置を計る。その位置と先に紹介したデーターより型枠を入れる位置を、写真8、9のようにガンネルに写す。
|
|
|
1. ガンネルバウ側から、右手のひらを広げ、中指先端から親指を曲げたところへ、左手中指先端から肘までを添える。左肘は1番ビームのくる位置にもあたる。
1: From the tip of gunwale bow, the length between right hand middle finger tip and thumb root + left hand middle finger tip to an elbow. This is the position of 1st beam.
|
2. 両腕は肩の高さで広げ、両手中指先端から先端まで。左手中指先端が4番ビーム・サイブレスの位置にもあたる。
2: From the position of 1st beam, open both arms, and scale the length between both middle finger tips. This is the position of 4th. The function of it is, a thigh brace.
|
3. 右手のひらを広げ、中指先端から親指先端、左手中指先端から肘までを添える。これが、コックピットサイズとなり、左肘は5番ビーム・バックレストの位置にもあたる。
3: From the position of 4th, scale the length between middle finger tip and thumb tip of opened right hand + middle finger tip to an elbow of left arm. This is the size of a cockpit, and the position of 5th beam. It becomes a back rest.
|
|
|
|
4. 両腕は肩の高さで広げ、両手中指先端から先端まで。
4: From the position of 5th, again open both arms, scale the length between both hand’s middle finger tips. |
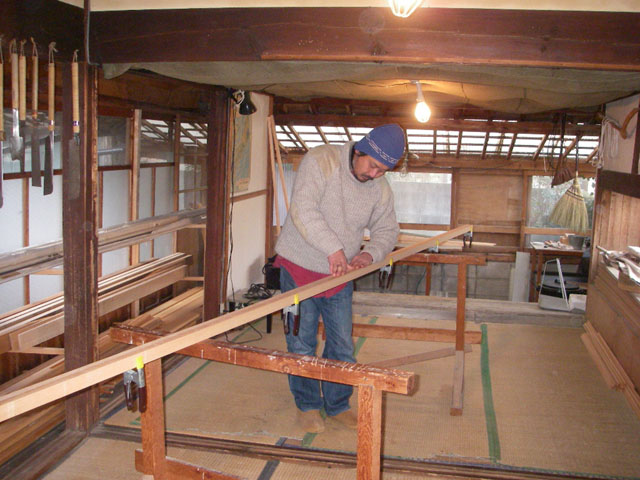
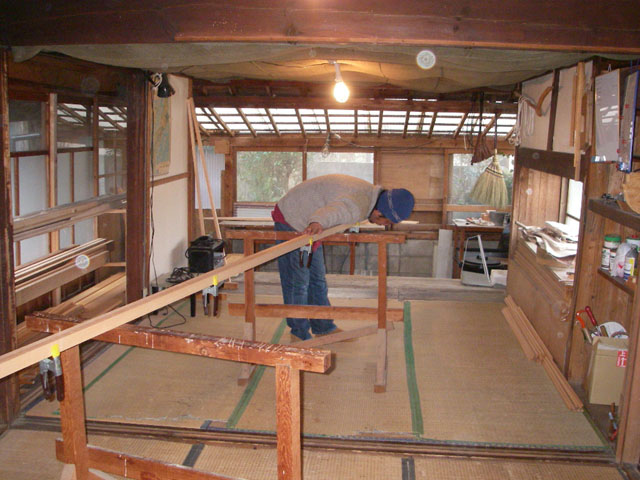
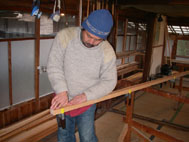
5,6. 柱などに背中をあて、長座しバイダルカに乗る姿勢になる。足はほとんど伸ばしたまま、わずかに膝を外に開き、軽く膝を持ち上げる。既製のカヤックに乗るフォームとは違う。柱からつま先までが5番ビームから3番ビームの位置となる。
5,6: Put a back on pillars, take baidarka riding position. Special attention is necessary, because it is little different from riding position of other modern sea-kayak. In other words, you must straighten out both legs, and bend and lift your knees a little when you ride a baidarka. Distance from a pillar to tiptoe becomes length from 5th beam to 3rd beam.
|
|
|
|
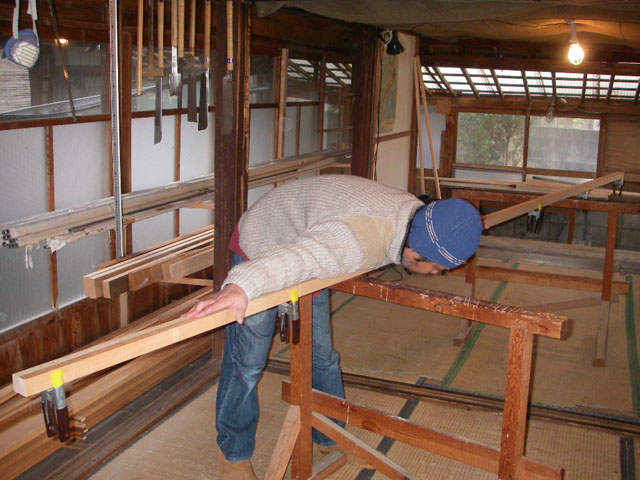
7. ガンネルスターン側に左肘を置き中指先端まで、右手のひらを開き、親指先端から中指先端までを添える。右手中指先端が7番ビームの位置にあたる。
7: From the tip of gunwale stern side, scale the length between middle finger tip and thumb tip of opened right hand + middle finger tip to an elbow of left arms. If you put your left elbow on the gunwale stern tip like photo, your right middle finger tip shows the position of 7th, rearmost deck beam.
At every position, you do not need “scale” the length actually, always your finger tips show them.
|
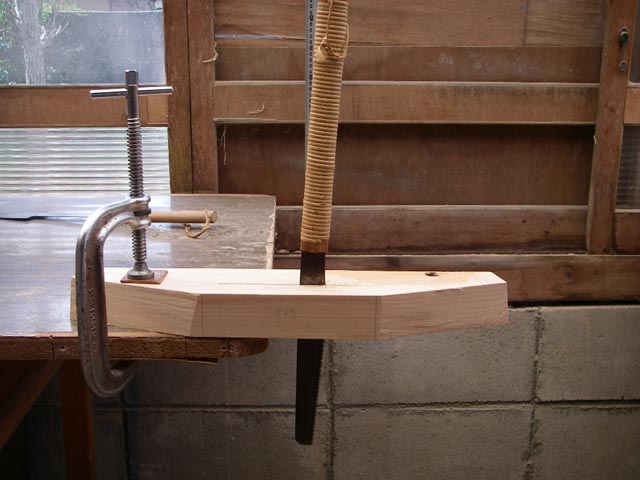
8. 2本のガンネルがずれないようにクランプなどで固定する。
8: Fix both gunwales with clamps, to avoid slipping off.
|
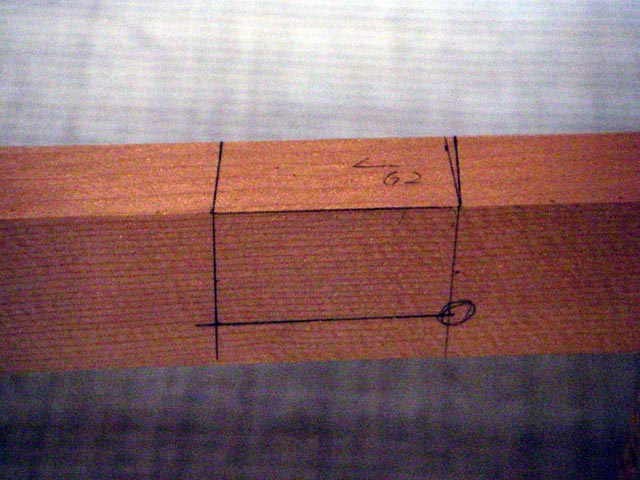
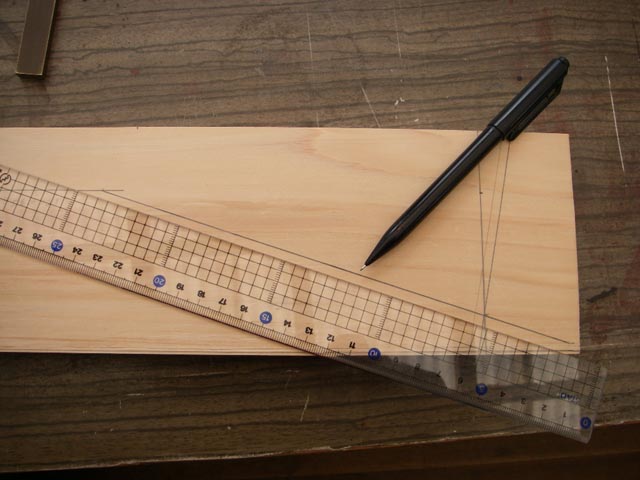
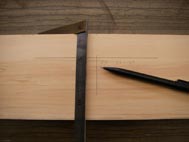
9. 直角定規を使い正確にそれぞれの位置を写す。くれぐれも左右正確に! ずれると歪んだバイダルカになる。
9: Here, you should use a right angle ruler. You must write lines of positions symmetry. You do not want to build a crooked craft do ya!
|
この項で紹介した計測の方法は、あくまでもこのバイダルカに於いてだ。バイダルカにもさまざまあり、それぞれに方法は違う。
コックピットの位置は慎重を期さなくてはならない。なぜならその位置でカヤックの性格は変わる。カヤックを操作する時、最もやっかいなのは、進行方向に対し斜め後方から吹く風だ。斜め後方から吹く風の中でカヤックを直進させようとすると、カヤックは風上、あるいは風下に進もうとする、いわゆる風見取り現象・ウエザーコック運動を起こす。
コックピットの位置でウエザーコック運動の度合いは変わる。バイダルカはバラストを積むカヤックなので比較的ボリュームがあるが、グリーンランドのカヤックのように極めてボリュームの小さいカヤックでは、コックピットの位置は非常にシビアーになる、わずか1cmずれただけで、カヤックの性格がかわる。
また、カヤックの左右のバランスは乗り手の技量で補うことはできるが、前後のバランスは作り手の技量にかかっている。詳しくはデッキビームとリブフレームの加工のところでお話ししよう。
極北地方に数在る伝統的なスキンカヤックの中でも、アリュートのバイダルカは最も緻密で繊細な構造だ。作り手には熟練した五感と手が必要だ。
A method of the measurement that I introduced here conforms only in this baidarka. There is some other type of baidarka, so you can see a various methods.
Special attention will be necessary for a position of a cockpit. Because character of kayak change depending on it. The wind blow from the diagonal rear always makes big problem for the course maintenance of kayak paddling. By that wind, a kayak deviates from a right course and try to go to windward or the lee. This irritating phenomenon is called a “weather cocking”.
If a position of a cockpit changes, degree of “weather cock” will be change. Baidarka has big capacity ( go out with ballast) but, for example, a capacity ofGreenlandic Kayak is extremely small, and a position of a cockpit becomes much closely.
It is possible to maintain the balance of right-left of a kayak with ability of a paddler, but the balance of bow-stern direction depends on ability of a builder. I will tell more detail in chapters of processing of deck beam and rib frame.
In various traditional kayak of North district, it is certain that baidarka of Aleut is the most delicate and precise craft, I think.
Experienced five senses and hand are indispensability to a builder.
2月18日 ガンネル材の加工 その3 Processing gunwale 3
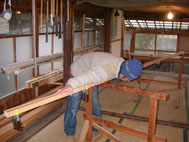
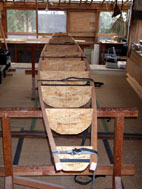
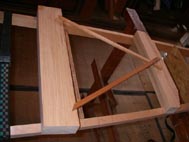
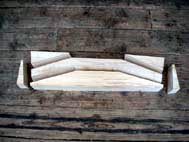
型枠の所定の場所に先のデーターより、ガンネル、ストリンガー、キールの位置を写し、凧糸が2重通る程度の穴をあける(写真1)。
この型枠をガンネルの所定の位置に収める(写真2)。
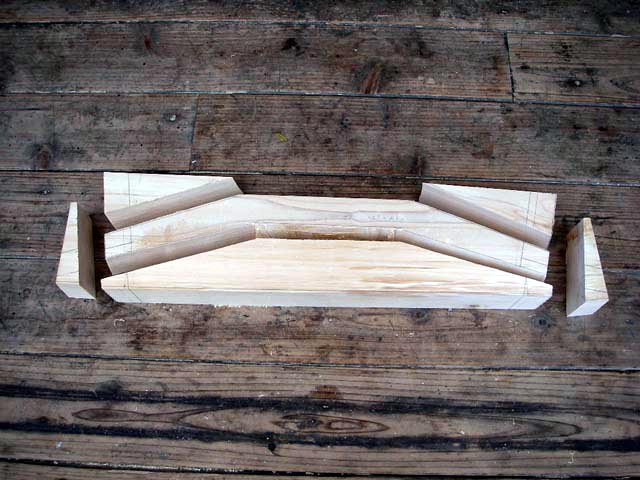
さて、この段階でガンネルには3つの捩じれた角度が出る。まず、カヤックの縦方向の中心線に対し、ガンネルは外方向に湾曲する(写真3)。
Based on a drawing ( see the chapter of 11th Dec), open holes diameter 2~3mm to station boards in position of gunwales, stringers, and keel (photo1).
Then install the station board on an appointed position of gunwales (photo2).
At this stage, gunwale streaks are twisted in three directions. First, it makes an outside curve for the vertical center (photo3).

|
|
|
写真1. このバイダルカの全幅はデーターでは52cmだが、多くの来館者に試乗して頂くことも目的とするので、全幅54cmとして型枠を作った。横幅が広くなると、カヤックの左右の安定感は増す。
Originally, the width of this Baidarka was 52cm according to the document.
But I decided to make the width 54cm by the purpose that many visitor can try and ride this. The width of Kayak deeply relates to left-right direction balance and stability.
|
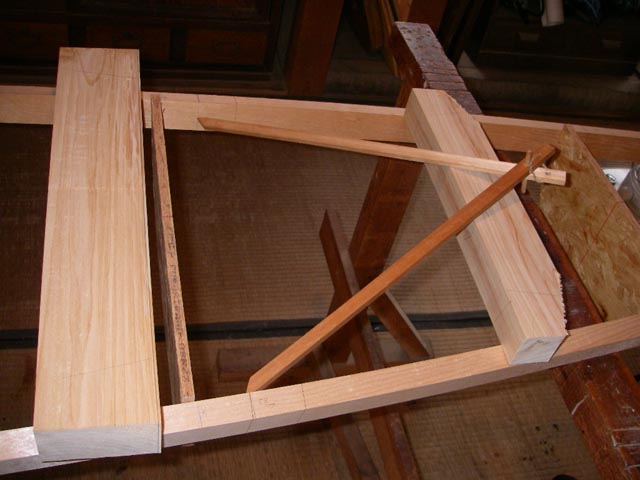
写真2. 2本のガンネルをロープなどで縛り、型枠を収める。ガンネルが捩じれたり、ずれたりしないように注意する。
Tying two gunwale planks and install the station boards. |
写真3. 縦方向の中心線に対し、必ず2本のガンネルが均等に同じラインになるようにする。
These two gunwale streaks must make equal curve for the vertical center. |
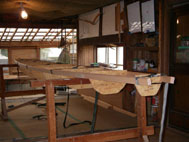
次に横から見ると、ガンネルの前後が僅かに上に反っている(写真4)。また垂線に対し、ガンネルの上部が外に開いている(写真5)。それぞれの角度は必ず左右均等に出さなくてならない。
先の材選びでお話ししたが、材の選択を誤ると、2本のガンネルが均等なラインを描いてくれなし、歪んだバイダルカが生まれてしまう。歪んだバイダルカは乗り手を翻弄するだろう。
次の工程では、ビームとガンネルをホゾ組みするが、ビームに切り出すホゾ、ガンネルに掘るホゾ穴ともに、この3つの角度が反映することを覚えておこう。
本来は型枠を使わず、適当な添え木を2本のガンネルの間にはさみ、この3つの角度を出す。ちなみに、そのように作る時の全幅・コックピット部の一番横幅の広い所は、腰に両方拳をあてた幅となる(写真6)。
Next, you see the slight upward bend on the front and rear tip of gunwales (photo4). And upside of gunwales bent slightly outside for the vertical center (photo5).
All bend and curve of wood parts must make symmetrically angles.
If you made wrong choice for wood materials, your Baidarka will end up as warped one. And he will be out control easily on the water!
At next chapter, we progress to the assemble part of Baidarka’s deck. Every angle of cross section will be very important for the next mortise-tenon process.
This using station board method is not common to me. I simply use some measure wood and my own body parts to decide the angle and the length.
For example, I decide the width of the widest part of Baidarka with my waist and both fists (photo6).
|
|
|
写真4. 僅かだが、前後が上に反っている。どの程度反らすかは、材によりけりとなる。
The front and aft slightly bent upward. This angle depends on what material of wood you use.
|
写真5. 垂線に対し、ガンネル上部は11度外に開いている。カヤックの前後が上に反るほど、この開き角度は大きくなる。
Upside of gunwales open outward about 11 degrees. This angle relates to the bend of gunwales. |
写真6. |
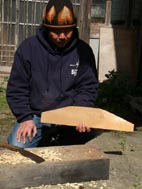
2月23日 ビームの加工 その1 Processing the deck beam 1
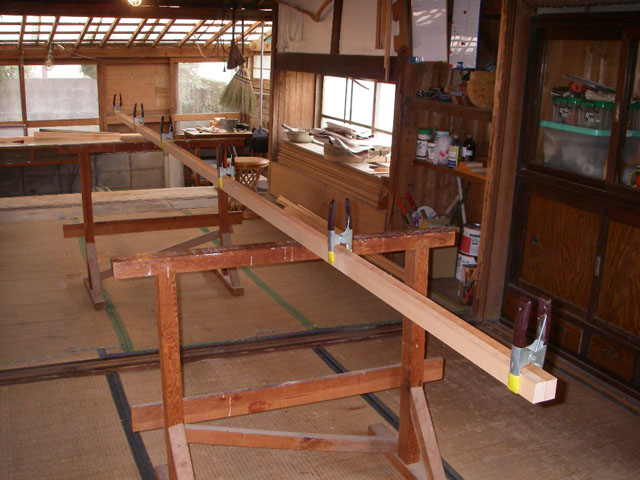
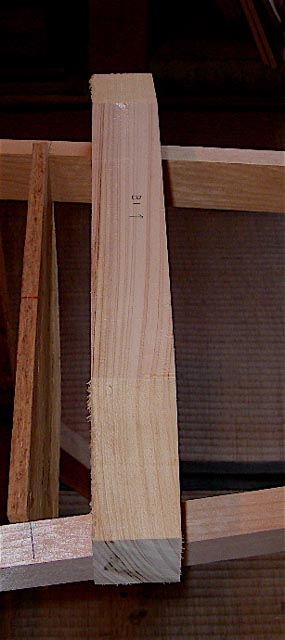
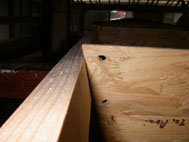
檜の板目材よりビーム材を切り出す(写真1)。厚み約4cm、幅はガンネル幅プラス約3cm、高さは場所により約7cmから11cmの角材を切り出し、ガンネルの所定の場所に置く(写真2)。前述したが、ガンネルは外方向に湾曲し、上部も外へ開いている(写真3)。その角度をビーム材に写す(写真4,5)。
Cutting out the beam from cypress, cross grain wood blank(photo1). 4cm thick and the width is gunwale-width plus 3cm, the height is 7~11cm.
Put these square woods in appointed positions on gunwales (photo2).
Then write the cross section angles to beam wood (photo4.5).
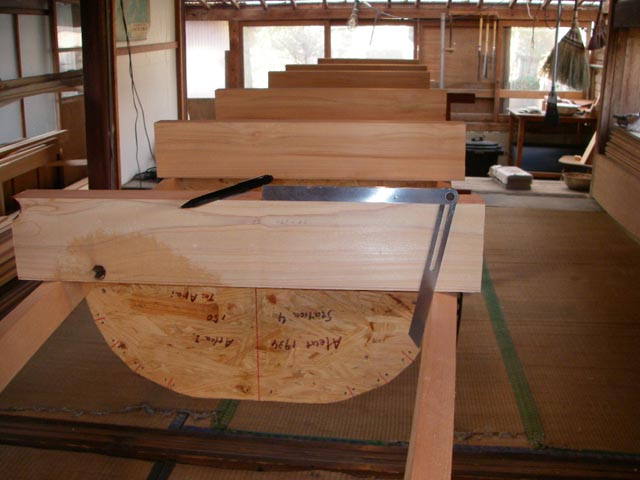
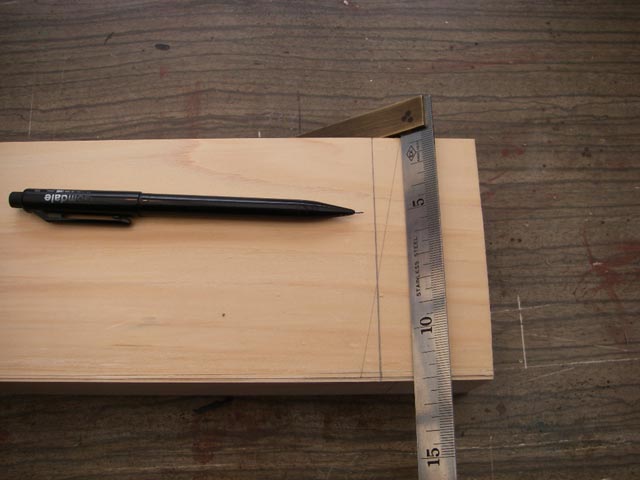
ビーム材の実幅を計る
ガンネルの所定の場所にホゾ穴の位置を記し(写真6)、計り(写真7)、ビーム材に写す(写真8)。この実幅が基準となる。
Scaling the true width of the beam
Write the position of the mortise hole on gunwale (photo6), scale (photo7), and write them to the beam wood (photo8)
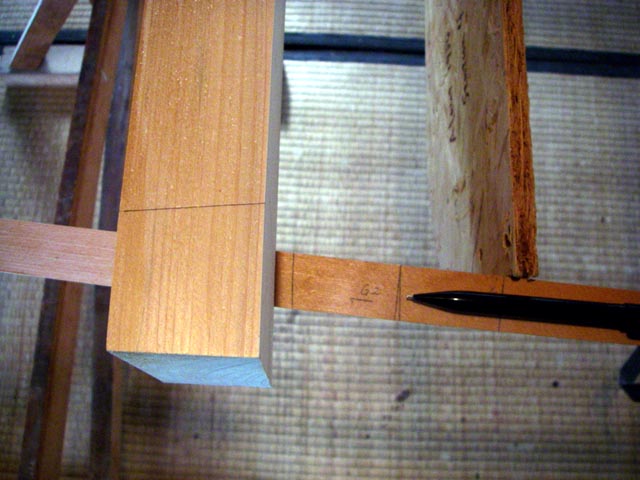
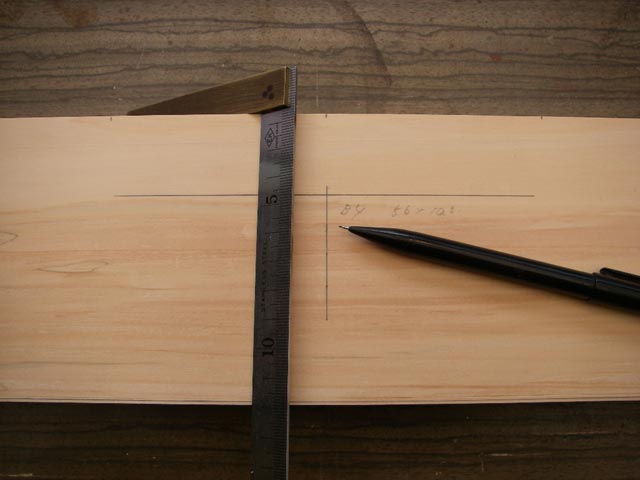
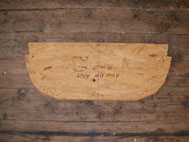
ビーム材にビーム実寸を描く
ビーム材前面、あるいは後面に、実幅の位置に垂線を引く(写真9)。この垂線に上部から3cmの位置と、ビームの立ち上がり位置を記す(写真10)。先の上部から3cmの位置に横線を引き、実幅の中心を出す(写真11)。ビームの立ち上がり位置に、先に取ったガンネルの角度を移す(写真12)。このような手順で、それぞれの線引き(写真13)を行い、ビーム材にビーム実寸を描く(写真14)。
Writing the true scale of the beam.
Write vertical line on front and rear side of the beam wood (photo9). And scale and write the position of upside and downside of the beam (photo10). Scale the center of the beam. Write the angle of cross section, then the true scale of the beam appears on the wood (photo14).
|

|

|
写真1. 長さ約2m、幅約25cmの1枚の檜材から、7本のビーム材を切り出す。
Length 200cm width 25cm cypress cross grain plank. Seven deck beams will all come from this one plank.
|
写真2. ガンネルの所定の場所に正確に置くこと。
Put beam woods in appointed position correctly |
写真3. ビームの木目を良くご覧頂きたい。このように木取りしないとビームは折れる。
See the grain of wood. Only cross grain wood will be right. If not, they will be broken by power of the ocean. |
 |
 |
 |
写真4. ガンネル上部が外へ開いている角度をビース材に写す。
Writing the angles of cross section on the beam wood. |
写真5. ガンネル前後が湾曲している角度をビーム材下に写す。
Writing the curve of gunwale on the beam wood. |
写真6. ガンネルに掘るホゾ穴の位置に基準を設ける。
The position of mortise hole on gunwale. |
 |
 |
 |
写真7. 2本のガンネルの内寸幅を計る。
Scaling the inside width of gunwale. |
写真8. そのまま、ビーム材の所定の位置に写す。
And write it on the beam wood. |
写真9. 僕はこの線を基準とし、ビーム実寸を描く。
I always use this line as a threshold for scaling the true-scale of the beam. |
 |
 |
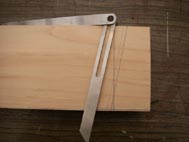 |
写真10. ビームの立ち上がり位置はそれぞれ違う。カヤックのサイズにもよるし、キールにどのような湾曲を持たせるかにもよる。
This cross section( down side of the beam) will be little hard to decide.
It just depend on what size of kayak you’ll build. |
写真11. この横線がビームを正面から見たときの厚みとなる。
This vertical line will be the thickness of the beam. |
写真12. 角度は正確に移すように。前述したが、この角度によりガンネル前後のラインが決まる。
The angle of cross section will be important. You must write this correctly on the beam wood. |
 |
 |
|
写真13、14. 線引きをして描き上がった、ビーム。前面と後面では、ガンネルの湾曲角度が影響するので、ビームの実寸は微妙に違う。
Now we see the true-scale of the beam. |
|
材の細かい数値は示していない。なぜなら本来は見た目で作業を行い、材同士は、そのつど削りながら擦り合わせるからだ。今回の作業は慣れないと多少複雑だ。長方体の材の中に、立体を描き、切り出す。空間を空間として捉え、手から紡ぎ出す。彫塑の基礎のようなものだと思う。
毎回感じる事だが、スキンカヤックの制作はジャズやブールス、古典落語のライブに似ている。約束事や決まり事の中で、自由奔放さを演じ、感情を表現する技術が在れば在るほど興に乗ずる。
音符や数値を追う事も大切だが、曲や話の流れ、木の目の流れを読み取り、手入れの行き届いた楽器や声で演ずるように、丁寧に仕立てられた刃物で削り出す。何よりも要求されるのは、対象と絡み合い、セッションする能力だ。古いアリュートの人々に取ってバイダルカを作る事は、そんな風に思えて仕方ない。
I am not showing any detailed numerical value here.
I think that kayak building is more like carving than any modern ship building and carpenter work. On the other hand, I feel that this fact always makes this work much complicated.
Does this kind of work remind you improvisation play of Jazz or Blues ?
Or classical “RAKUGO・・・traditional Japanese oral lirerature “?
How we can play and enjoy our freedom of life in the rules of music, orin the strict rules of natural environment ?
So for me, building Baidarka is always art of life.
It is not only chasing the numerical value or the notes, we must feel the stream of wood grain, sharpness of our hand tools and instruments. That’s how we can do session with something and someone.
And that’s how Aleutian people lived together with power of the ocean, I think.
2月28日 ビームの加工 その2
Processing deck beam2
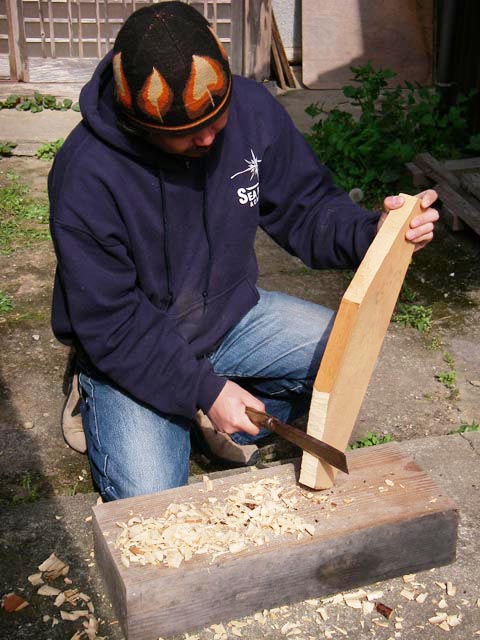
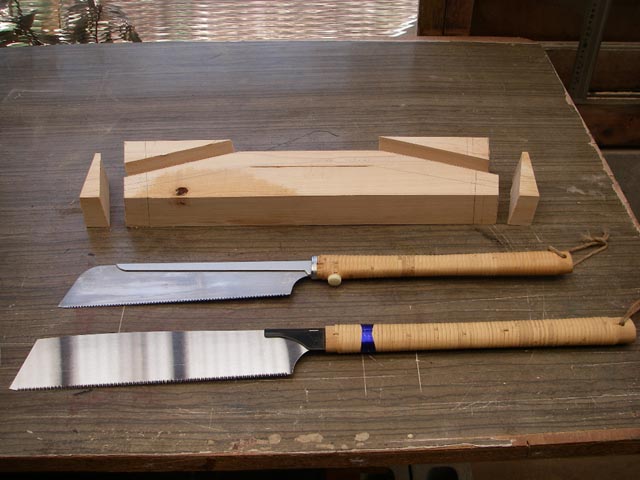
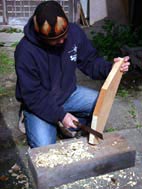
まず、古いアリュートの人々と同じ方法を紹介しよう。適当な大きさの材を鉈などを使い、ビームの形をはつり出す(写真1、2)。もちろん線引きなどはしない。できれば黒曜石の手斧などで作ってみたいと思う。
次に手ノコを使う場合だが、造作ノコまたは中目ノコを使い、ビームの横・上部をノコ挽きする(写真3)。ビーム下部は畔挽きノコ、廻し挽きノコを使いノコ挽きする(写真4、5、6)。
ビーム材から挽き出されたビーム(右)。 ノコ挽きする事により、まだ使える材が取れる。
At the beginning of this stage, I introduce the method which Aleutian builder must have taken.Using hatchet or small hand axe, cut wood plank by chopping and make a demanded form. I often dream to do this work with ancient obsidian tool someday !
Next, these are pretty modern way. Just use saw. In Japan, there used to be a lot of kind of saw, depending on the purpose. Basically you should use the saw which fitted a purpose (photo3,4,5,6). By using saw, you can make minimum waste of wood.
|
|

|
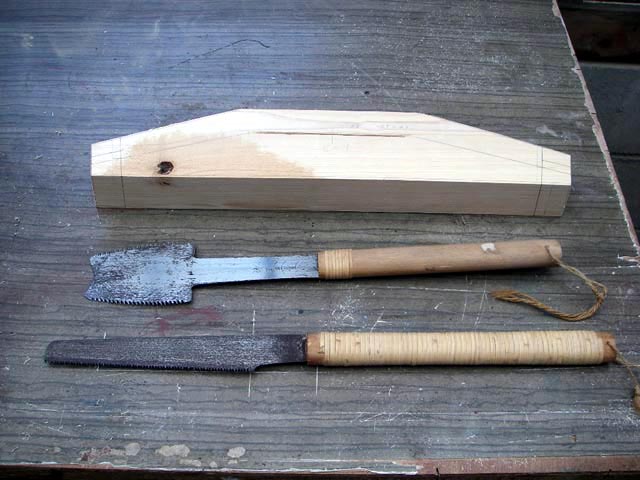
写真1. 部材に適した木目取りをした材は、鉈1本で簡単に形が出せる。
If you could work along the grain of wood correctly, forming the wood with a hatchet will be easy. |
写真2. 途中の段階だが、このように少しずつ形を作り、最後はナイフなどで仕上げる。
Roughly cut by a hatchet, then finish by a knife. |
写真3. 僕は、ホゾ挽きや胴付きノコを好む。
My favorite saws ( modern Japanese saw ? Even in a small town we can bye these kind of saw at DIY shop in Japan). The blade is changeable. |
|
|
|
写真4. 上は畔挽きノコ、下は廻し引きノコ。
These two are more traditional.They used to be used by shipbuilder and carpenter, but in nowadays only carpenters who work for Buddhist temple or Shinto shrine may use them. |
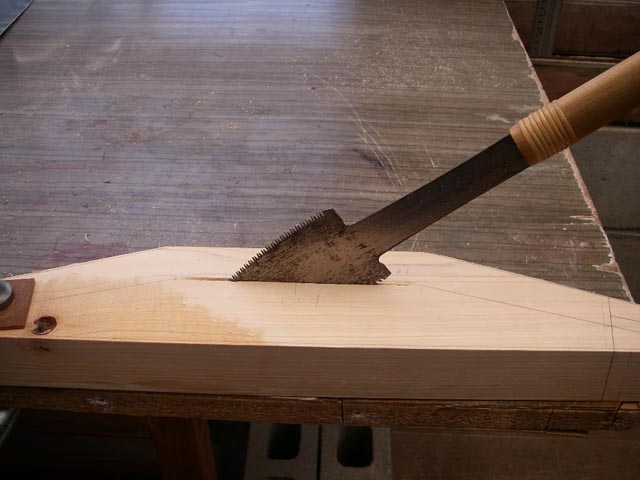
写真5. 畔挽きノコで、ビーム下部を挽き降ろす。
The way of using a traditional saw 1. |
写真6. 挽き目が貫通したところで、廻し引きノコを使う。
The way of using traditional saw 2. |
ビームを切り出す方法はいくつもある。やっかいなのはビーム下部の切り離しだ。もっとも簡単な方法はジグソーを使う事だろう。トリマーでもいいだろう。また手ノコで細かく切れ目を入れ、ノミではつる方法もある。
だけど僕は電動工具を好まない。バイダルカを作る方法としては相応しくないと考えている。電気が無ければ暮らしに必要な道具が作れないなんて、不自由極まりないと思っている。
早い・簡単、消費文明の対局に在るのが、古いアリュートの暮らしであり、バイダルカであるはずだ。手間を味わい喜びとする知と時が、我々の未来に必要な気がする。
There is many way to make a deck beam. Simplest way is just using electric-saw to cut wood.
But for building an ancient style craft like Baidarka, using electric-move-tool is not suitable. Can’t we build a kayak without electricity and sophisticated modern tool ? I don’t think so.
We are living in this comfortable civilization, but on the other hands, we are wasting our precious time and wisdom, and our freedom. If you really want to build a Baidarka, you will be noticed that these time and wisdom and freedom are indispensable, sooner or later.
And it may show you the possibility or worthiness of living outside of 21cetury standard’s civilization. The most precious answer will may be found, in our abandoned past.
|